
Boardoza NuMaker M263KI Microcontroller Evaluation Board
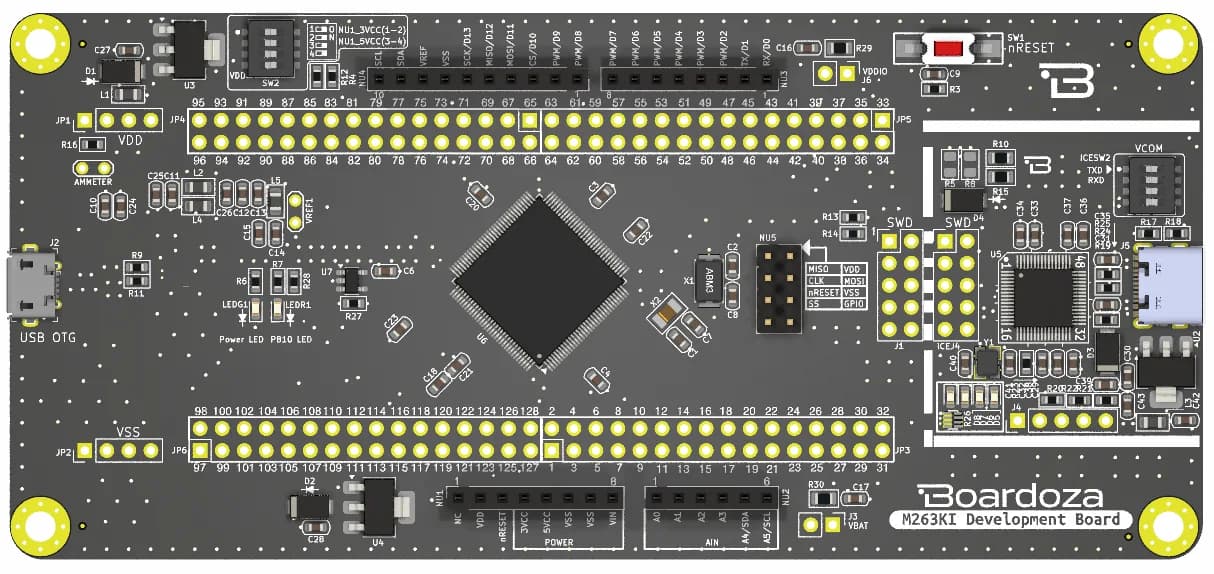
The NuMaker-M263KI consists of two parts, a M263 platform and an on-board Nu-Link2-Me debugger and programmer. The NuMaker-M263KI allows users to quickly develop and easily program and debug application.
The NuMaker-M263 offers M263KI full pins extension connectors, Arduino UNO compatible extension connectors and diversified power supply option. It is an easy-to-develop platform for user to expand the functionality and build the applications. The NuMaker-M263KI also provides an ammeter connector, allows user to monitor the microcontroller’s power consumption during development.
The Nu-Link2-Me is a debugger and programmer that supports on-line programming and debugging through SWD interface. Nu-Link2-Me provides virtual COM port (VCOM) function to print out messages on PC. Nu-Link2-Me can be separated from NuMaker-M263KI, allowing user programming and debugging functionality for other projects.
Temel Özellikler
- M263KIAAE’nin tüm pinleri için genişletme konnektörleri
- Arduino UNO uyumlu genişletme konnektörleri
- Mikrodenetleyicinin güç tüketimini ölçmek için ampermetre konnektörü
- Harici VDD besleme konnektörü
- Arduino UNO uyumlu Vin genişletme konnektörü
- M263 platformunda USB güç konnektörü
- Nu-Link2-Me üzerinde ICE USB konnektörü
- SWD arayüzü üzerinden hata ayıklama
- Çevrimiçi programlama
- Sanal COM portu işlevi
Teknik Özellikler
- Ürün
- Boardoza NuMakerM263KI
- Giriş Voltajı
- ( Aşağıdaki tabloya bakın )
- Kart Boyutları
- 63x137.5mm
- Mounting Hole Size
- 4 x M3
- Yapılandırma 1
- Hedef Yonga Gerilimi: 3.3 V; Vin \[1\]: 7 V \~ 12 V Giriş; J2: X; NuLink USB (J5): Dikkate almayın; SW2 Seçimi: NU1_3VCC; JP1: 3.3 V çıkış
- Yapılandırma 2
- Hedef Yonga Gerilimi: 3.3 V; Vin \[1\]: X; J2: PC’ye bağlayın; NuLink USB (J5): Dikkate almayın; SW2 Seçimi: NU1_3VCC; JP1: 3.3 V çıkış
- Yapılandırma 3
- Hedef Yonga Gerilimi: 5 V (R12 ve R4 lehim pedlerini kısa devre edin); Vin \[1\]: 7 V \~ 12 V Giriş; J2: X; NuLink USB (J5): Dikkate almayın; SW2 Seçimi: NU1_5VCC; JP1: 5V çıkış
- Yapılandırma 4
- Hedef Yonga Gerilimi: 5 V (R12 ve R4 lehim pedlerini kısa devre edin); Vin \[1\]: X; J2: PC’ye bağlayın; NuLink USB (J5): Dikkate almayın; SW2 Seçimi: NU1_5VCC; JP1: 5V çıkış
- Yapılandırma 5
- Hedef Yonga Gerilimi: 3.3 V; Vin \[1\]: Dikkate almayın \[5\]; J2: Dikkate almayın \[5\]; NuLink USB (J5): PC’ye bağlayın; SW2 Seçimi: OFF; JP1: 3.3 V çıkış
Destek
Teknik sorular, dokümantasyon ve hata bildirimleri için GitHub deposunu kullanabilir veya doğrudan bize yazabilirsiniz.